Visits
The Visits tab has three sub tabs: Visit Call, Visit Create, and Visit End. These are described below.
Visit Call
If a phone number is added to the Visit, or a Customer with a phone number is related to the Visit, the Customer will get an SMS once his/her Visit is called (if this is enabled in the Notifications unit type).

This page has two different configuration areas: The
Settings configuration to the left is used to trigger the notification, and the
Call Message configuration to the right is used to configure the actual message.
Select the Branches and Queues for which the Visit Call notification should be sent.
Select All or a single Service, from the drop-down list, that the message should be valid for.
Enter the message to be sent. You can fill in information in the message, by inserting Parameters from the drop-down list.
Do not forget to click Save, in both areas, to save your settings.
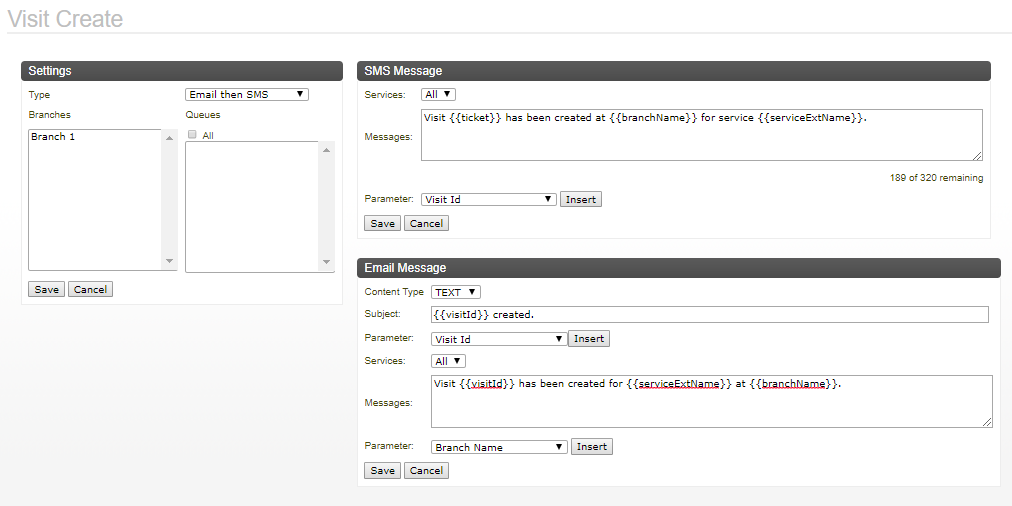
Visit Create
If a phone number is added to the Visit, or a Customer with a phone number is related to the Visit, an SMS is sent to the Customer, just after the Visit is created.

This page has two different configuration areas: The
Settings configuration to the left is used to trigger the notification, and the
SMS Message and
Email Message areas, to the right, is used to configure the actual message(s).
Select the Type of message that you want to use, from the drop-down list (Email then SMS / Email / SMS / Both Email and SMS). Then, select the Branches and Queues for which the Visit create notification should be sent.
Depending on if you want to send out an SMS, an Email, or both, enter the following settings:
• SMS Message:
• Services - select the wanted Services.
• Messages - enter the message text. You can also insert
Parameters, by selecting them from the drop-down list and then clicking
Insert. For more information, see
“Parameters” .
• Email Message:
• Content Type - select either TEXT or HTML.
• Subject - enter the subject of the email.
• Services - select the wanted Services.
• Messages - enter the message text. You can also insert
Parameters, by selecting them from the drop-down list and then clicking
Insert. For more information, see
“Parameters” .
Do not forget to click Save, in all applicable areas of the tab, when done.
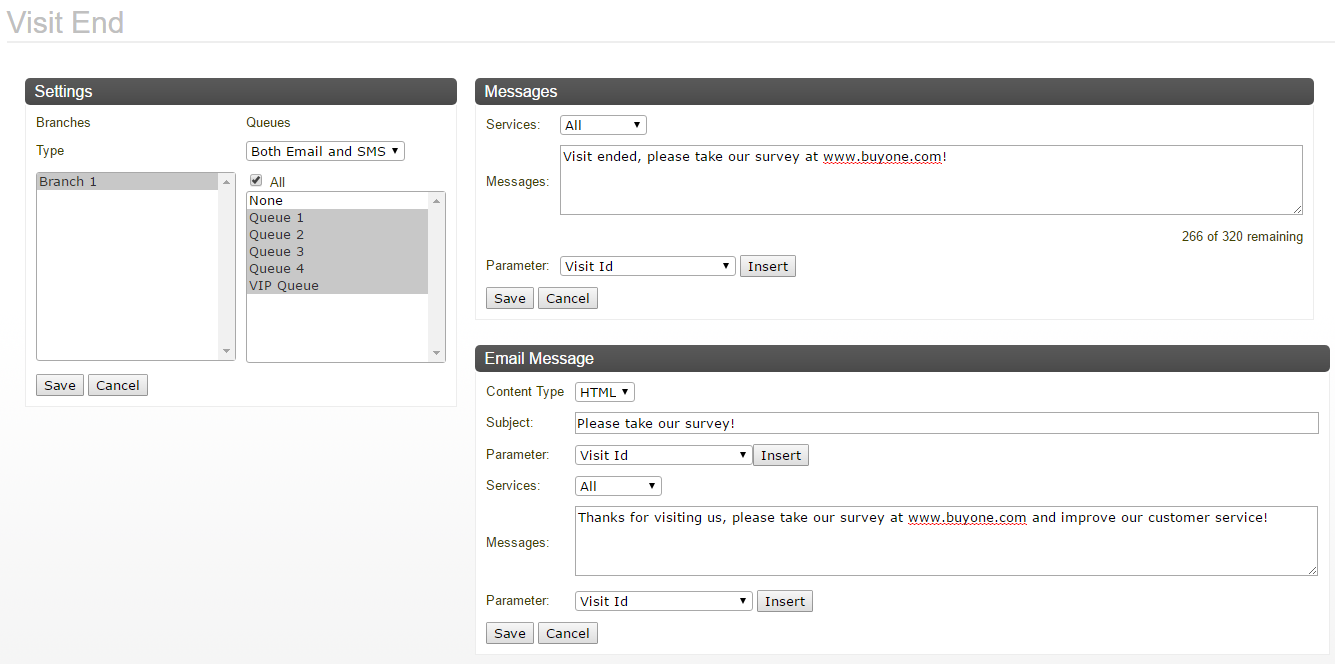
Visit End
If a phone number or email address is added to the Visit, or a Customer with a phone number and/or email address is related to the Visit, an SMS/email is sent to the Customer, just after the Visit is ended. This could be useful, for example, if you want to send out a survey to the Customer.

This page has two different configuration areas: The
Settings configuration to the left is used to trigger the notification, and the
SMS Message and
Email Message areas, to the right, is used to configure the actual message(s).
Select the Type of message that you want to use, from the drop-down list (Email then SMS / Email / SMS / Both Email and SMS). Then, select the Branches and Queues for which the Visit end notification should be sent.
Depending on if you want to send out an SMS, an Email, or both, enter the following settings:
• SMS Message:
• Services - select the wanted Services.
• Messages - enter the message text. You can also insert
Parameters, by selecting them from the drop-down list and then clicking
Insert. For more information, see
“Parameters” .
• Email Message:
• Content Type - select either TEXT or HTML.
• Subject - enter the subject of the email.
• Services - select the wanted Services.
• Messages - enter the message text. You can also insert
Parameters, by selecting them from the drop-down list and then clicking
Insert. For more information, see
“Parameters” .
Do not forget to click Save, in all applicable areas of the tab, when done.
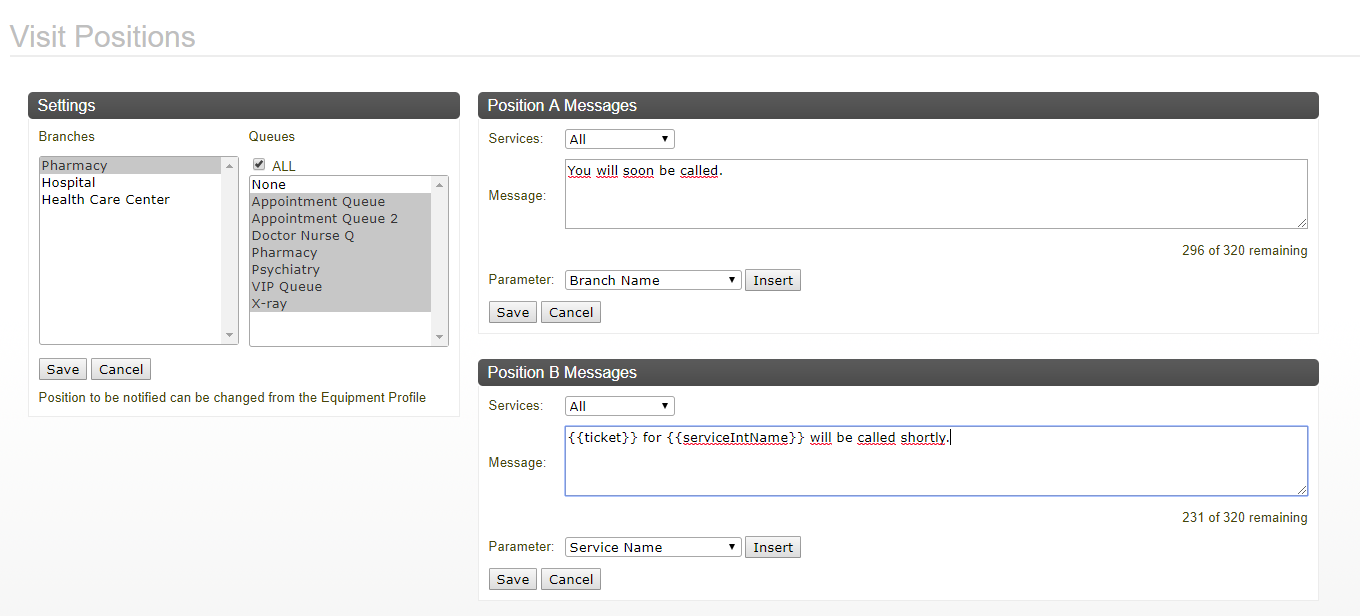
Visit Positions
When the Visit reaches certain positions in the Queue, the Customer will get an SMS, if a phone number has been registered for that Customer. The position(s) in the Queue is defined in the Notifications unit type.

This page has two different configuration areas: The
Settings configuration to the left is used to trigger the notification(s) and the
Position A Message and
Position B Message configuration areas, to the right, are used to configure the actual messages.
Select the Branches and Queues for which the Visit Call notification should be sent.
Select All or a single Service, from the drop-down list, that the message should be valid for.
Enter the messages to be sent. You can fill in information in the message, by inserting Parameters from the drop-down list.
Do not forget to click Save, in all areas, to save your settings.


 This page has two different configuration areas: The Settings configuration to the left is used to trigger the notification, and the Call Message configuration to the right is used to configure the actual message.
 This page has two different configuration areas: The Settings configuration to the left is used to trigger the notification, and the SMS Message and Email Message areas, to the right, is used to configure the actual message(s).
 This page has two different configuration areas: The Settings configuration to the left is used to trigger the notification, and the SMS Message and Email Message areas, to the right, is used to configure the actual message(s).
 This page has two different configuration areas: The Settings configuration to the left is used to trigger the notification(s) and the Position A Message and Position B Message configuration areas, to the right, are used to configure the actual messages.