Business Intelligence
Introduction
If you want to use Orchestra Business Intelligence, the installation is run as a second part of the installation, i.e after you have installed Orchestra and Stat.
The Orchestra Business Intelligence solution is based on the third party product Pentaho Business Analytics. This means that to be able to use Orchestra Business Intelligence, you need to install a database for the Business Analytics Repository, which contains solution content, scheduling, and audit tables needed for the Business Analytics Server to operate.
For more information about setting up the Business Analytics Repository, see:
Installation Scenarios
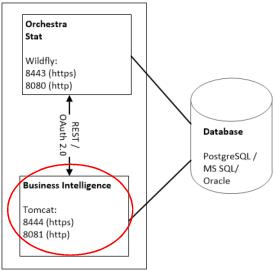
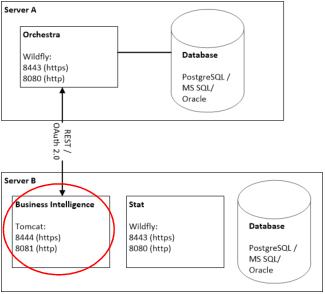
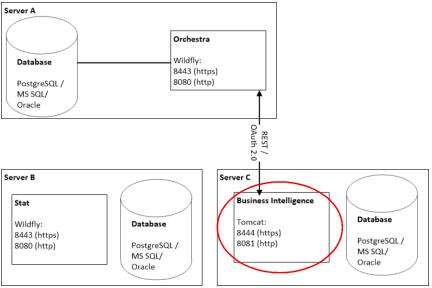
Business Intelligence can either be installed on the same server as Orchestra and Stat (A), or on the same server as Stat (B), or on a separate server altogether (C):
A:
B:
C:
No matter where or how Business Intelligence is installed, it is always installed in the same way, using the same installation wizard, see
“Business Intelligence Installation Wizard” . This installation wizard will install the following:
• JDK
• Tomcat
• Pentaho
• PostgreSQL- if used and if Business Intelligence is installed on a separate server.
It will also run the database scripts for Business Intelligence.
Set up Business Analytics Repository for an already installed PostgreSQL database
The Business Analytics Repository consists of three repositories:
• Jackrabbit contains the solution repository, examples, security data, and content data from reports that you use Orchestra Business Intelligence to create.
• Quartz holds data that is related to scheduling reports and jobs.
• Hibernate holds data that is related to audit logging.
To create the Jackrabbit, Quartz and Hibernate databases, you can do one of the following:
• Automatic procedure:
1. Run the <full path to business intelligence installation package>/db/postgres-scripts.bat file.
2. Follow the instructions in the actual script.
For example, if PostgreSQL is not installed in the default folder, you will be asked to enter the path to your PostgreSQL installation.
You may also be prompted for “Password for user postgres”, which is the password that you stated when installing PostgreSQL.
Finally, when prompted for “Password for user pentaho_user”, enter password.

Make sure that you enter the
correct password(s) while running the script, according to the instructions above!
• Manual procedure:
Initialise the database, by running DDL:s that contain SQL commands that create the Jackrabbit, Quartz and Hibernate databases. This procedure is described below, for both
Windows and
Linux users.
Windows
1. Open an SQL Shell window.

The
SQL Shell window is installed with PostgreSQL. After installation, it can be found in the
Start menu, under
All Programs\PostgreSQL<version_number>.
2. When prompted for the server enter the name of the server, unless you are using the default (localhost). If you are using the default, do not type anything and click Enter.
3. When prompted for the database, enter the name of the database, unless you are using the default (postgres). If you are using the default, do not type anything and click Enter.
4. When prompted for the port, enter the name of the port if you are not using the default (5432). If you are using the default port, do not type anything and click Enter.
5. When prompted for the username, accept the default, then click Enter.
6. When prompted for the password, enter the password that you indicated when you installed PostgreSQL.
7. Run the script to create the Jackrabbit database by typing this:
\i <full path to business intelligence installation package>/db/bi-jcr-postgres.sql

In the
SQL Shell window, it is important that you use forward slashes (
/) in the full path name (non-Windows standard)!
8. Run the script to create the hibernate database by typing this:
\i <full path to business intelligence installation package>/db/bi-repository-postgres.sql
9. Run the script to create the Quartz database by typing this
\i <full path to business intelligence installation package>/db/bi-quartz-postgres.sql
10. Enter the password at the prompt. The default is password.
11. Exit from the window by clicking Ctrl + C.
Linux
To run the SQL scripts on a Linux system, do this:
1. Open a Terminal window.
2. Sign into PostgreSQL by typing psql -U postgres -h localhost at the prompt.
3. Run the script to create the Jackrabbit database by typing this:
\i <Full path to business intelligence installation package>/db/bi-jcr-postgres.sql
4. Run the script to create the hibernate database by typing this:
\i <Full path to business intelligence installation package>/db/bi-repository-postgres.sql
5. Run the script to create the Quartz database by typing this:
\i <Full path to business intelligence installation package>/db/bi-quartz-postgres.sql.
6. Exit from the window by clicking Ctrl + C.
Verify that databases and user roles have been created
1. Open the PGAdminIII tool, which is bundled with both the Windows and Linux versions of PostgreSQL.
2. In the Object Browser, click the PostgreSQL folder and enter the password when prompted.
3. Click the Databases folder. The Jackrabbit, Postgres, Hibernate and Quartz databases should appear.
4. Click the Login Roles folder. The jcr_user, pentaho_user, hibuser, and postgres user accounts should appear.
If the databases and login roles do not appear, try to run the scripts, as described above, again.
5. Select File->Exit to exit from PGAdminIII.
Set up Business Analytics Repository - SQL Server
The following instruction describes how to configure Orchestra Business Intelligence to run towards a repository in SQL Server and should be performed after the normal installation.
Initialize SQL Server Repository Database
To initialize SQL Server so it serves as the BA Repository, run SQL scripts to create the Hibernate, Quartz and Jackrabbit (also known as the JCR) databases.
<Business Intelligence installation package>/db/bi-jcr-mssql.sql
<Business Intelligence installation package>/db/bi-quartz-mssql.sql
<Business Intelligence installation package>/db/bi-repository-mssql.sql
To make the databases that you create more secure, we recommend that you change the default passwords in the SQL script files to ones that you specify.
If you do decide to make the databases more secure, use a text editor to change the passwords in these files:
a. Although there are several different methods for running SQL scripts (for example SQL Server Management Studio), these instructions explain how to execute the scripts from a Terminal or Command Prompt window.
1. Open a Terminal or Command Prompt window, enter the following:
sqlcmd -S <host> -U <user> -P <password> -i bi-jcr-mssql.sql
2. Run the script to create the Jackrabbit database by typing START bi-jcr-mssql. If necessary, append the path to the bi-jcr-mssql.sql path in the command.
3. Run the script to create the repository database by typing START bi-repository-mssql. If necessary, append the path to the bi-repository-mssql.sql path in the command.
4. Run the script to create the Quartz database and users by typing START bi-quartz-mssql. If necessary, append the path to the bi-quartz-mssql.sql path in the command.
Set up Business Analytics Repository - Oracle
The following instruction describes how to configure Orchestra Business Intelligence to run towards a repository in Oracle and should be performed after the normal installation.
Initialize Oracle Repository Database
To initialize Oracle so it serves as the BA Repository, run SQL scripts to create the Hibernate, Quartz and Jackrabbit (also known as the JCR) databases.
<Business Intelligence installation package>/db/bi-jcr-ora.sql
<Business Intelligence installation package>/db/bi-quartz-ora.sql
<Business Intelligence installation package>/db/bi-repository-ora.sql
The scripts will create a tablespace named pentaho_tablespace.
To make the databases that you create more secure, Pentaho recommends that you change the default passwords in the SQL script files to ones that you specify.
If you do decide to make the databases more secure, use a text editor to change the passwords in these files:
a. Although there are several different methods for running SQL scripts, these instructions explain how to run SQL*Plus from a Terminal or Command Prompt window.

These instructions are the same for both Windows and Linux. If you prefer to run SQL scripts using another method, modify instructions accordingly.
1. Open a Terminal or Command Prompt window, start the SQL*Plus and log in.
2. Run the script to create the Jackrabbit database by typing START bi-jcr-ora. If necessary, append the path to the bi-jcr-ora.sql path in the command.
3. Run the script to create the repository database by typing START bi-repository-ora. If necessary, append the path to the bi-repository-ora.sql path in the command.
Run the script to create the Quartz database and users by typing START bi-quartz-ora. If necessary, append the path to the bi-quartz-ora.sql path in the command.
Business Intelligence - Installation
Prerequisite
• Orchestra is completely installed and the Orchestra license is activated.
Preparation
1. Copy the QP_BusinessIntelligence_<type>-<version_number>.zip file and unpack the files to a suitable directory, such as tmp.

It is recommended that path names containing spaces should
not be used.
Installation Note - Truststore
During the installation, the truststore file inside the Java instance referred by the JAVA_HOME system property can be copied to the Java truststore, by setting the import.java.cacert property in the install.properties file to true (false by default).
The truststore is found in the folder <BI installer dir>\app\jdk1.8.0_131\jre\lib\security\cacerts.
If your certificate is already imported to the Java instance referred to by the JAVA_HOME property, please set the import.java.cacert property to true before installation. Otherwise, the certificate should be imported directly to the <BI installer dir>\app\jdk1.8.0_131\jre\lib\security\cacerts folder.
Installation
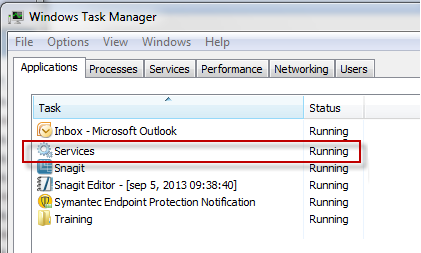
1. Open the Windows Task Manager and ensure that there is no application called “Services” running, see the picture below. If there is, close the Services application. This is done, to not cause any problems with starting and stopping the Orchestra service, during the installation procedure.
/<tmp_dir>/install.bat
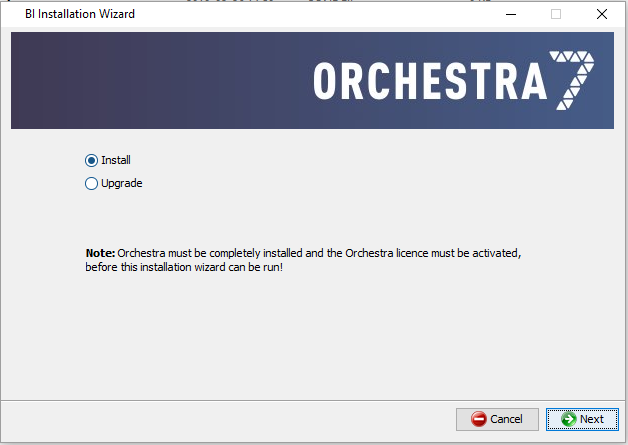
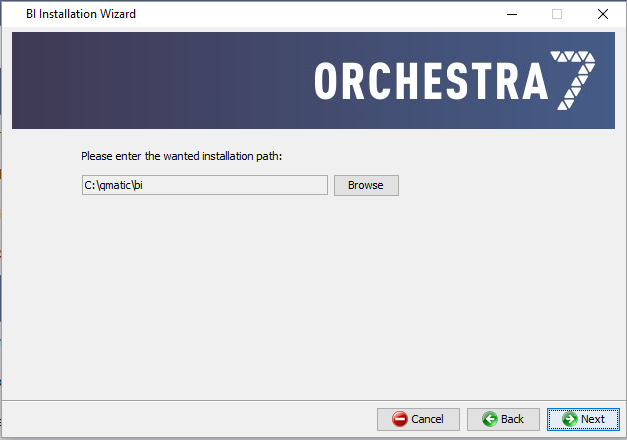
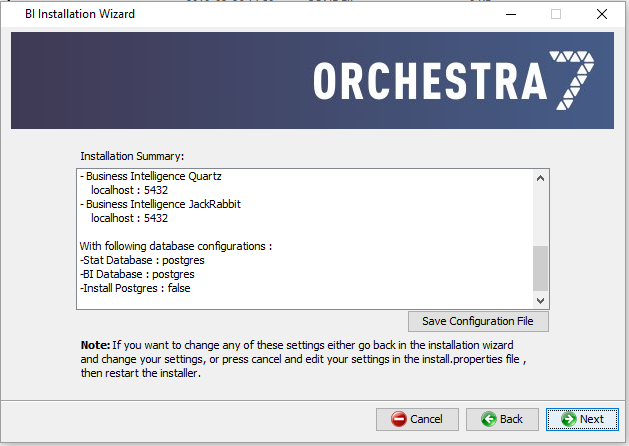
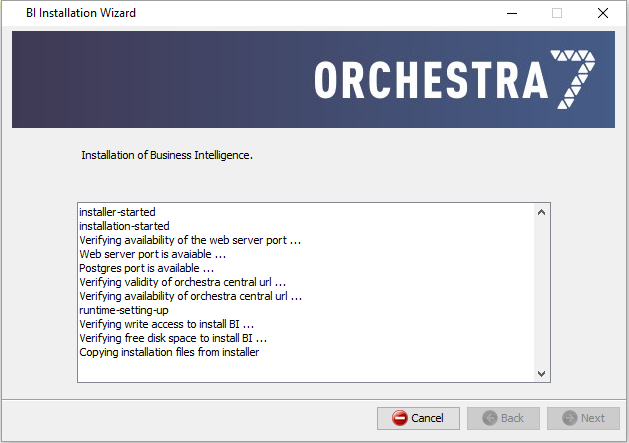
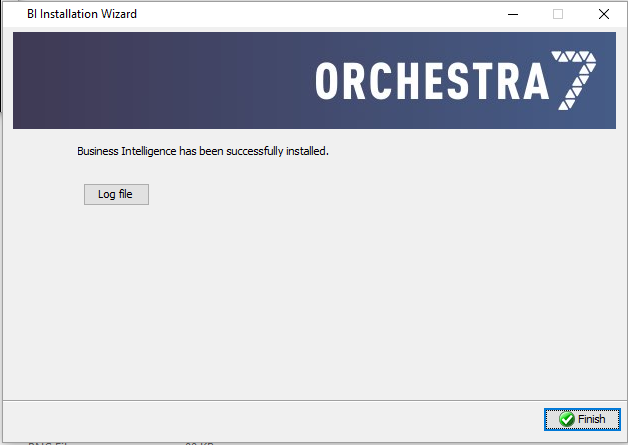
Business Intelligence Installation Wizard
The wizard contains the following steps:
Updates to shiro.ini - Implementing Single Sign Off
To enable single sign off for Business Intelligence (closing both the Orchestra and the Business Intelligence session at the same time, via the Logout option in the Orchestra top bar), you need to manually update the shiro.ini file on the Orchestra server, located in <orchestra_install_dir>\conf\ in the following ways:
• Add the Business Intelligence logout URL to the orchestratedLogout.logoutUrls section, as in the following example:
#orchestratedLogout.logoutUrls = http://<custom-oauth2-client-server>/custom-oauth2-client/Logout
orchestratedLogout.logoutUrls = https://t167.qmaticcloud.com:8444/businessintelligence/Logout

Note that Logout must be written with a capital L!
Updates to shiro.ini - Adding the Business Intelligence Server IP
• Add the Business Intelligence Server IP to the following section:
/qsystem/rest/security/account/** = oauth2, noSessionCreation, ipFilter[127.0.0.1,0:0:0:0:0:0:0:1]
Example - How to Prevent Faulty Entry:
Update the section above to this:
/qsystem/rest/security/account/** = oauth2, noSessionCreation, ipFilter[127.0.0.1,192.168.22.50,got-antwin-005]

For the changes to take place, a restart of Orchestra is needed.
Installation - Linux
Preparation:
1. Transfer the QP_BusinessIntelligence_linux64-<version>.tgz file to the server, preferably to a tmp directory. Use for example scp to transfer the file.

It is recommended that path names containing spaces should
not be used.
2. Login to the Orchestra Central server with a user with superuser rights.
3. Create a qmatic user:
#sudo adduser qmatic
4. Create Business Intelligence directory:
#sudo mkdir -p /opt/qmatic/bi/
5. Grant rights for Business Intelligence directory to qmatic user:
#sudo chown -R qmatic:qmatic /opt/qmatic
6. Switch to qmatic user:
#sudo su - qmatic
7. Unpack Orchestra tgz file, to a tmp directory:
$ cd /<tmp_dir>
$ tar zxvf QP_BusinessIntelligence_linux64-<version>.tgz
Installation
1. Switch to qmatic user:
#sudo su - qmatic
2. Make sure that the Business Intelligence installation directory is empty and that there is no space in the path name.
$ /<install_dir>/install.sh
To run the installation in silent mode:
$./install.sh -s
4. When the installation has finished, switch to user with super user rights:
$ exit
5. Change directory:
#cd /opt/qmatic/bi/bin
6. Add startup scripts to operating system:
#sudo ./install-services.sh
7. Open the URL and start configuring the system. Please refer to the Administrator’s Guide, that can be found on Qmatic World.
http://<ORCHESTRA_IP>:8080
User: superadmin
Password: ulan

 If PostgreSQL is selected as repository database, installation will install it and run the repository database script. If that is the case, these steps can be skipped! If you, however, are using SQL Server or Oracle, see the instructions for those databases, here:
“Set up Business Analytics Repository - SQL Server” and
“Set up Business Analytics Repository - Oracle” .
 Make sure that you enter the correct password(s) while running the script, according to the instructions above!
 The SQL Shell window is installed with PostgreSQL. After installation, it can be found in the Start menu, under All Programs\PostgreSQL<version_number>.
 In the SQL Shell window, it is important that you use forward slashes (/) in the full path name (non-Windows standard)!
 These instructions are the same for both Windows and Linux. If you prefer to run SQL scripts using another method, modify instructions accordingly.
 It is recommended that path names containing spaces should not be used.
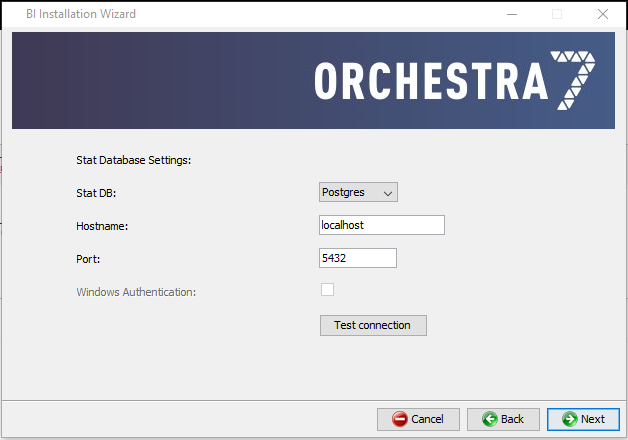
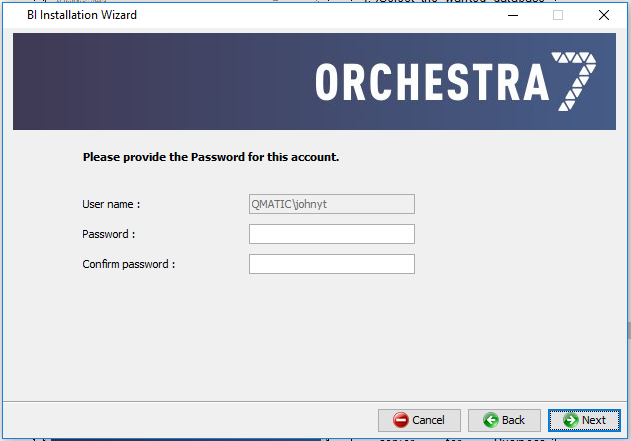
 For SQL Server, you can also select Windows Authentication. For more information, see
“Installation Note - Windows Authentication” .
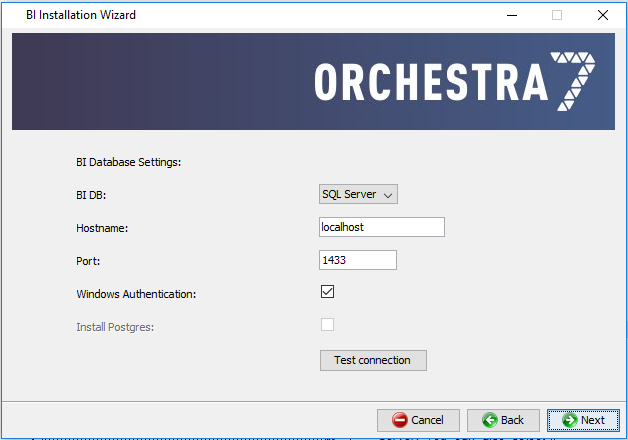
 If you select SQL Server, you can also select Windows Authentication. For more information, see
“Installation Note - Windows Authentication” .
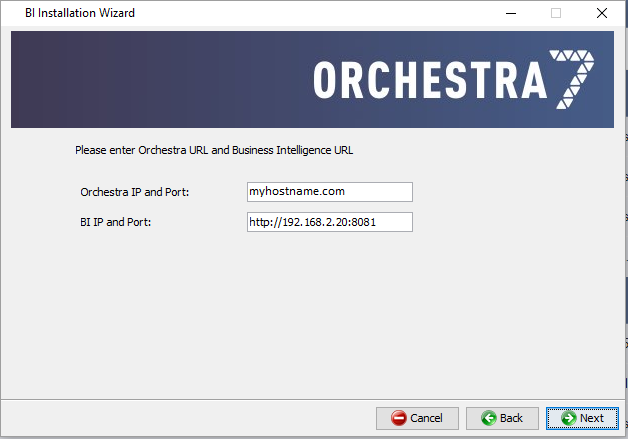
 Host names used by Orchestra should follow the RFC952 specifications. For
more information, see https://tools.ietf.org/html/rfc952.
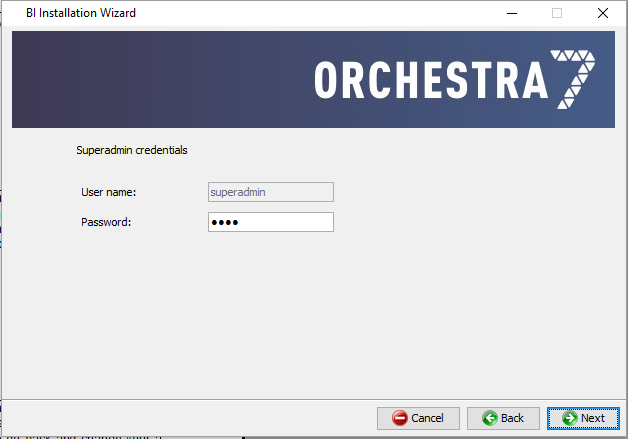
 After installation, follow the steps in the section
“Updates to shiro.ini - Implementing Single Sign Off” .
 Note that Logout must be written with a capital L!
 For the changes to take place, a restart of Orchestra is needed.
 It is recommended that path names containing spaces should not be used.